How To Change Time On Windows 10
Did you know that 1 in 3 Windows users struggle with changing the time on their computers? If you find yourself among those struggling, fear not! In this post, I will guide you through the step-by-step process of How To Change Time On Windows 10.
Accessing the Date and Time settings is the first step towards taking control of your computer’s clock. You can adjust the time zone from there to ensure accurate local time representation. And if you’re in a hurry, don’t worry! Changing the date and time is just a few clicks away. What about staying synchronized with an Internet Time Server? We’ve got you covered on that front too. You’ll learn to keep your computer’s clock accurate by regularly syncing it. Personalizing your time format and enabling or disabling Daylight Saving Time are options worth exploring for optimal time management.
Finally, if any time-related issues arise, we’ll troubleshoot them together. So let’s get started and learn How To Change Time On Windows 10!
Key Takeaways
- Access Date and Time settings in the Windows 10 ‘Settings’ menu
- Adjust the time zone to ensure accurate local time
- Use the ‘Adjust date/time’ option to change the date and time easily
- Sync with an Internet Time Server for a more accurate clock
Access The Date And Time Settings
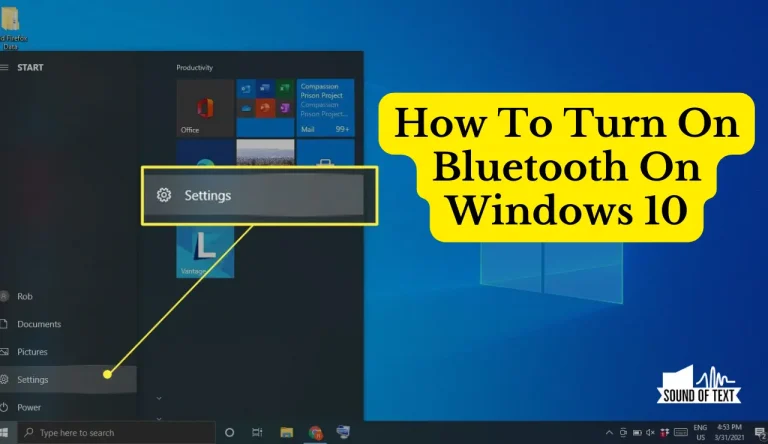
To access the Date and Time settings, you’ll need to dive into the depths of your Windows 10 system. Changing the time display or setting it automatically is a breeze once you know where to look. To Start:
- Clicking on the Start menu and selecting ‘Settings.’
- From there, choose ‘Time & Language.’ In this window, you’ll see various options related to date and time.
- Click ‘Change date and time formats’ under the ‘Date & Time’ section to change the time display format. Here, you can customize the time displayed on your computer screen.
If you want to set the time automatically, simply toggle the switch labelled ‘Set time automatically.’ Syncing with an online service will ensure your system’s clock is always accurate.
Adjust The Time Zone
Set your preferred time zone by accessing the Date and Time settings on your Windows 10 device. To troubleshoot time zone issues, follow these steps: first, click on the Start menu and select ‘Settings.’ Then, click ‘Time & Language’ and navigate to the ‘Date & Time’ tab.
Under the ‘Time Zone’ section, you can manually select your desired time zone from the drop-down menu. If you want Windows 10 to adjust your time zone based on location, enable the ‘Set time zone automatically’ option. This feature uses your device’s location services to accurately determine your current time zone. By following these instructions, you can ensure that your Windows 10 device displays the correct local time in any time zone you may be in.
Change The Date And Time
By adjusting your device’s date and time settings, you can effortlessly synchronize your activities with the rest of the world. Changing the system clock on Windows 10 is a simple process that allows you to update the date and time displayed on your computer manually. To do this,

- Click on the date and time in the bottom right corner of your screen.
- Select ‘Adjust date/time.’
- You can manually change the date and time from there to reflect accurate information.
Windows 10 provides an option to set up automatic time updates. By enabling this feature, your computer will automatically adjust its time based on internet synchronization. This ensures your device always displays the correct time without requiring manual intervention.
Synchronize With An Internet Time Server
Ready to synchronize your device with an Internet Time Server? Get ready for a wild ride through the world of timekeeping! Accurate time synchronization is crucial for various reasons. It ensures that all devices in a network display simultaneously, which is essential for coordinating tasks, meetings, and deadlines. Accurate time is crucial for security as it allows systems to timestamp events accurately and promptly detect any anomalies or breaches.
Using an Internet time server offers several benefits. Firstly, it provides a reliable source of accurate time that’s constantly updated. These servers receive their time from highly precise atomic clocks maintained by organizations like the National Institute of Standards and Technology (NIST). By synchronizing with these servers, you can be confident that your device’s clock will always be accurate.
Moreover, internet time servers are convenient as they automatically adjust for daylight saving changes. This eliminates the hassle of manually changing the time twice a year and ensures that your device remains synchronized even during these transitions. Synchronizing your device with an Internet Time Server not only guarantees accuracy but also simplifies the process of keeping track of time across multiple devices and networks.
Customize The Time Format
Customizing the time format allows me to personalize how I view and interpret timestamps, adding a touch of individuality to my device’s display. To change the time display on Windows 10, I can easily set my preferred time format.
First, I need to open the Settings app by clicking the Start button and selecting ‘Settings’. Then, I select ‘Time & Language’ and go to the ‘Date & Time’ tab. Under the ‘Change date and time formats’ section, I can click on the drop-down menu next to ‘Short time’ or ‘Long time’ to choose my desired format. The options include 12-hour or 24-hour formats with or without seconds displayed.
Once I have selected it, Windows will automatically update and show the new time format throughout my device’s interface.
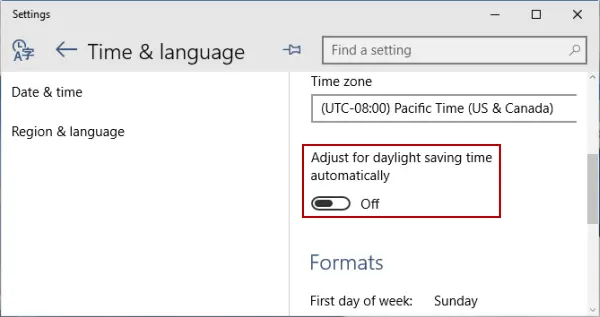
Enable or Disable Daylight Saving Time
When daylight saving time begins, you’ll feel like you’re gaining an extra hour of sunlight each day, as if the world has hit the fast-forward button. Daylight saving time impacts energy consumption by extending daylight hours in the evening, reducing the need for artificial lighting and potentially decreasing electricity usage. However, its effect on energy conservation is a topic of debate.

The historical background of daylight saving time dates back to World War I, when it was introduced to save fuel during wartime. Since then, controversies have surrounded this practice with arguments about its impact on energy savings and whether it disrupts sleep patterns or causes health issues. Despite these debates, many countries still observe daylight saving time to use natural light better during long days.
Troubleshoot Time-related Issues
If you’re experiencing any issues with time on your device, don’t worry – I’ve got you covered! Time discrepancies in different operating systems can be a common problem, but solutions exist. Incorrect time settings can have a significant impact on computer performance, so it’s essential to troubleshoot and fix any time-related issues promptly.
- Firstly, ensure your Windows 10 is set to the correct time zone.
- Go to the Date & Time settings and select the appropriate region.
- If the issue persists, turn off automatic time synchronization and manually set the correct date and time.
If that doesn’t work, check if your device’s BIOS (Basic Input/Output System) has the correct date and time settings. Access the BIOS by restarting your computer and pressing a specific key (usually F2 or Del) during startup. It would help to verify that your internet connection is stable, as an unstable network connection can sometimes cause time-related problems.
Frequently Asked Questions
Concluding “How To Change Time On Windows 10”
Changing the time on Windows 10 is a simple process that can be done through the Date and Time settings. By adjusting the time zone, changing the date and time, synchronizing with an internet time server, customizing the time format, and turning daylight saving time on or off, users can ensure their system’s clock is accurate.
Remember, “Time waits for no one,” so it’s important to keep your computer’s time up to date for efficient and timely operations.


