How To Configure Hathway Wifi Router
Are you struggling to configure your Hathway WiFi router? Look no further! This detailed guide will walk you through the process step by step. By following these instructions, you’ll be able to set up and personalize How To Configure Hathway Wifi Router your router to meet your specific needs.
To get started, gather all the necessary equipment and ensure that everything is in working order. Then, connect your router to the modem using an Ethernet cable.
Once connected, access the router’s configuration page through a web browser on your computer.
Next, it’s time to set up your wireless network. Choose a unique network name (SSID) and create a secure password to prevent unauthorized access. You can also configure advanced settings such as port forwarding or parental controls if desired.
Security is crucial when it comes to routers, so we’ll show you how to secure yours by enabling encryption and changing default login credentials.
Finally, test your connection and troubleshoot any issues that may arise along the way.
With this comprehensive guide at hand, configuring your Hathway WiFi router will be a breeze!
Key Takeaways
- Gather necessary equipment: router, power adapter, Ethernet cable, modem, computer/smartphone.
- Connect router to modem using Ethernet cable.
- Access router’s configuration page by typing IP address into web browser.
- Set up wireless network with unique network name and secure password.
Gather the Necessary Equipment
You’ll need to gather the necessary equipment before you can start configuring your Hathway wifi router. Setting up the necessary equipment is crucial to ensure a smooth and hassle-free installation process.
First, make sure you have the router itself along with its power adapter and Ethernet cable.
Additionally, check if you have a modem provided by your internet service provider (ISP) as it’ll be required to connect your router to the internet.
It’s also recommended to have a computer or smartphone with internet access for troubleshooting common WiFi router issues that may arise during setup.
Once you have all the equipment ready, you can proceed to the next step of connecting your router to the modem seamlessly, creating a stable network connection for all your devices.
Connect Your Router to the Modem
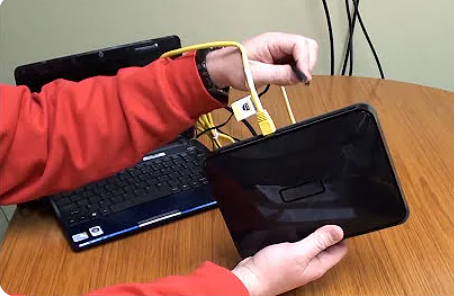
To connect your router to the modem, start by powering off both devices.
Next, connect an Ethernet cable from the modem’s Ethernet port to the WAN or Internet port on the router.
Then, power on both the modem and router.
This will establish a connection between your modem and router, allowing you to access the internet through your Wi-Fi network.
Power Off Your Modem and Router
First, make sure to switch off your modem and router to begin the configuration process for your Hathway WiFi router. This step is crucial as it allows you to troubleshoot any internet issues and optimize your wifi signal. By powering off both devices, you’re ensuring a clean start for the configuration process.
To power off your modem and router:
- Locate the power buttons on both devices.
- Press and hold the power button on each device until they turn off completely.
Once both devices are powered off, you can proceed with connecting the ethernet cable from the modem to the router. This will establish a connection between the two devices and allow for seamless communication during the configuration process.
Connect the Ethernet Cable from the Modem to the Router
Once both devices are powered off, the magic begins as you connect the ethernet cable from the modem to the router, creating an unstoppable bond that’ll supercharge your internet connection.
This step is crucial for establishing a stable and reliable network connection. To ensure a successful connection, make sure to use a high-quality Ethernet cable and securely plug one end into the Ethernet port on the back of your modem.
Then, connect the other end into the WAN or Internet port on your router. If you encounter any issues with the ethernet connection, try using a different cable or checking for loose connections.
Additionally, make sure that both devices are properly powered on before proceeding to the next step of configuring your Hathway WiFi router.
With this seamless connection established, let’s move on to powering on your modem and router to complete the setup process effortlessly.
Power On Your Modem and Router
Now it’s time to unleash the power of your internet connection by powering on your modem and router.
To troubleshoot connectivity issues and optimize router performance, follow these steps:
- Ensure that both the modem and router are plugged into a power source.
- Wait for the lights on both devices to turn on and stabilize. This may take a few minutes.
- Check the LED indicators on the modem and router. They should show a solid green or blue light, indicating a successful connection.
- If you encounter any issues, try restarting both devices by turning them off, waiting for a minute, and then turning them back on.
- Make sure that all cables are securely connected.
Once your modem and router are powered on, you can access the router’s configuration page to further customize your network settings.
Access the Router’s Configuration Page

To access the configuration page of your Hathway WiFi router, simply type in the router’s IP address into your web browser.
If you’re experiencing any issues with connecting to your router, troubleshooting steps can be found on the configuration page.
Once you’ve accessed the page, you’ll be able to configure various settings, including setting up a guest network access. This feature allows you to create a separate network for guests without giving them access to your main network. You can set up specific security options and manage the devices connected to this guest network.
After configuring these settings, you can proceed to set up your wireless network by following the next section.
Set Up Your Wireless Network
Make sure you’re ready to set up your wireless network and get your devices connected.
Here are a few things to consider:
- Enhanced Security: Protect your network by configuring security settings such as setting a strong password, enabling WPA2 encryption, and disabling remote administration. This will ensure that only authorized users can access your network and keep your data safe.
- Optimized Performance: To optimize network performance, choose the right channel for your router to minimize interference from other devices. You can also adjust the transmission power to maximize coverage or reduce it if you want to limit the range of your Wi-Fi signal.
- Guest Network: Create a separate guest network for visitors to use, keeping them isolated from your main network. This provides an additional layer of security and prevents guests from accessing sensitive information on your devices.
Now that you’ve set up your wireless network, let’s move on to configuring advanced settings.
Configure Advanced Settings
To configure advanced settings on your Hathway WiFi router, you can set up port forwarding to allow specific internet traffic to reach a device on your network.
You can also enable Quality of Service (QoS) to prioritize certain types of data traffic for smoother performance.
Additionally, adjusting the wireless channel and transmit power can help optimize your WiFi signal strength and reduce interference from other devices.
Set Up Port Forwarding
Configuring port forwarding on the Hathway wifi router allows for seamless access to specific devices on your network. This feature is especially useful if you want to remotely access devices like security cameras or gaming consoles.
To configure port forwarding, follow these steps:
- Log in to your router’s web interface.
- Navigate to the ‘Advanced Settings’ section.
- Locate the ‘Port Forwarding’ or ‘Virtual Server’ option and click on it.
Next, you’ll need to configure the following settings:
- Enter the internal IP address of the device you want to forward ports to.
- Specify the range of ports you want to forward.
- Configure firewall settings accordingly.
If you encounter any issues while configuring port forwarding, try troubleshooting by checking if your firewall is blocking incoming connections or if there are any conflicting settings.
Once port forwarding is set up, you can move on to enabling quality of service (QoS) for a better internet experience. Enabling QoS ensures that certain devices or applications receive priority over others when it comes to internet bandwidth allocation.
Enable Quality of Service (QoS)
Boost your internet experience by enabling Quality of Service (QoS), which prioritizes certain devices or applications over others for better bandwidth allocation. Enabling QoS on your Hathway WiFi router offers several benefits.
Firstly, it ensures a smooth and uninterrupted online gaming or streaming experience by giving priority to these activities.
Secondly, it allows you to allocate more bandwidth to important devices like smart TVs or work laptops, ensuring faster and more reliable connections.
To optimize network performance with QoS, consider setting up a rule-based system where you assign higher priority to specific IP addresses or MAC addresses associated with critical devices.
Additionally, you can limit the bandwidth for less important devices or applications.
By implementing these best practices, you can effectively manage and prioritize network traffic for an improved online experience.
Now let’s move on to adjusting the wireless channel and transmit power settings for further optimization.
Adjust Wireless Channel and Transmit Power

Improve your WiFi signal strength and coverage by adjusting the wireless channel and transmit power settings on your device.
To adjust the wireless channel settings, log in to your Hathway WiFi router’s admin interface and navigate to the Wireless or WiFi settings page. Here, you can change the channel from Auto to a specific channel that has less interference from other nearby devices.
Optimize the transmit power levels by selecting an appropriate setting that balances signal range and stability. Higher power levels may provide better coverage, but they can also cause more interference with neighboring networks.
Once you have adjusted these settings, you can move on to securing your router to protect your network from unauthorized access.
Secure Your Router
To ensure your router is safe and protected, it’s important to set up a strong password that only you and trusted individuals know. Router security is crucial in preventing unauthorized access to your network.
Begin by logging into your router’s web interface using the default gateway IP address. Navigate to the wireless settings section and locate the option to change the Wi-Fi password. Choose a password that is complex, combining uppercase and lowercase letters, numbers, and special characters. Avoid using easily guessable information like birthdays or addresses. By implementing password protection, you can safeguard your network from potential threats.
Now that you’ve secured your router with a strong password, it’s time to test your connection and troubleshoot any issues that may arise.
Test Your Connection and Troubleshoot
Check your connection and troubleshoot any problems that may arise to ensure a smooth and frustration-free internet experience. Here are some troubleshooting tips to help you optimize your connection speed:
- Restart your router: Sometimes, a simple restart can fix connectivity issues. Unplug the power cord from the router, wait for about 30 seconds, and then plug it back in.
- Check cable connections: Ensure all cables are securely connected to both the modem and the router. Loose or damaged cables can affect your internet speed.
- Update firmware: Visit the manufacturer’s website and check if there are any firmware updates available for your router. Updating the firmware can improve performance and resolve known issues.
By following these troubleshooting tips, you can identify and resolve any connectivity issues that might be affecting your internet speed.
Enjoy a seamless online experience with optimized connection speeds!
Frequently Asked Questions
Conclusion
To conclude, configuring your Hathway WiFi router is a straightforward process that can provide you with a secure and reliable internet connection. By gathering the necessary equipment and connecting your router to the modem, you can access the router’s configuration page.
From there, you can set up your wireless network, configure advanced settings, and secure your router. Finally, test your connection to ensure optimal performance. Following these steps will allow you to customize and optimize your WiFi network according to your specific needs and preferences.