How To Clean Headphones?
Are your headphones looking and sounding a little worse for wear? It’s time to give them a thorough cleaning! Cleaning your headphones not only improves their appearance, but it also helps maintain their performance and extends their lifespan.
In this step-by-step guide, we’ll show you how to clean headphones like a pro.
First, gather all the necessary materials:
- a soft cloth
- cotton swabs
- rubbing alcohol or disinfectant wipes
- some mild soap
Then, remove the ear cushions and tips from your headphones. Wipe down the exterior of your headphones with a slightly damp cloth to remove any dirt or grime.
Next, it’s time to clean the ear cushions and tips. Gently wash them with mild soap and water, ensuring they are completely dry before reattaching them.
Don’t forget about the headphone cables! Use a cloth dampened with rubbing alcohol to wipe away any dirt or oils on the cables.
Lastly, clean the headphone jack by gently inserting a cotton swab dipped in rubbing alcohol into the port and rotating it around.
Once everything is clean and dry, reassemble your headphones. Now you can enjoy crisp sound quality while rocking stylishly clean headphones!
Key Takeaways
- Cleaning headphones is important for improving appearance, maintaining performance, and extending their lifespan.
- Use the appropriate materials such as soft cloth, cotton swabs, mild soap, rubbing alcohol, and cleaning solutions specifically designed for headphones.
- Follow the steps to clean headphones, which include removing ear cushions and tips, wiping down the exterior, cleaning ear cushions and tips with mild soap and water, cleaning headphone cables with rubbing alcohol, and cleaning the headphone jack with a cotton swab dipped in rubbing alcohol.
- Also, consider tips for thorough cleaning and replacement of ear cushions and tips, such as selecting the right size and shape for a snug fit, considering memory foam options for enhanced comfort, and regularly replacing worn-out or damaged cushions.
Gather the necessary materials
Before we dive into the exciting world of headphone cleaning, let’s gather all the materials you’ll need.
First and foremost, you’ll need cleaning solutions specifically designed for headphones. These solutions are usually alcohol-based and effectively remove dirt, oil, and grime from your headphones. Additionally, you may want to explore some DIY headphone cleaning hacks using everyday household items such as cotton swabs or toothbrushes.
To clean your headphones effectively, it’s important to have a microfiber cloth on hand. This type of cloth is gentle on the delicate surfaces of your headphones and ensures a streak-free finish. Remember to avoid using abrasive materials that could scratch or damage your headphones.
Now that we have gathered all the necessary materials for cleaning your headphones, let’s move on to the next section: removing ear cushions and tips.
Read Also:
How To Connect Sony Headphones To Macbook?
Is It Illegal To Wear Headphones While Driving
Remove ear cushions and tips
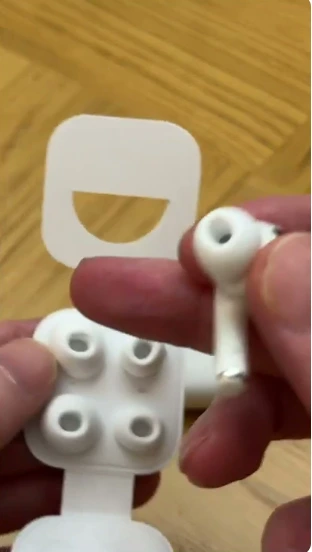
To start freshening up your headphones, go ahead and remove those snug ear cushions and tips. This will allow you to thoroughly clean them and replace any worn-out components.
When replacing the ear cushions, make sure they’re securely attached to maintain optimal comfort during use. Also, selecting the proper ear tips fitting is crucial for both sound quality and noise isolation. Here are some key points to consider:
- Choose ear cushions that match the size and shape of your ears for a snug fit.
- Look for memory foam options that provide enhanced comfort.
- Consider silicone or rubber ear tips for better noise isolation.
- Regularly replace worn-out or damaged ear cushions to prevent discomfort or reduced functionality.
Now that you’ve removed the ear cushions and tips, it’s time to move on to wiping down the exterior of your headphones without neglecting any dirt or grime buildup.
Wipe down the exterior
Now that you’ve got those ear cushions and tips off, let’s give the exterior of your headphones a good wipe down to make them shine like new.
Start by preparing a cleaning solution using mild soap or gentle dish detergent mixed with warm water. Dampen a soft cloth or sponge with the solution, making sure it’s not too wet as excess moisture can damage the electronics.
Begin wiping down the entire exterior surface of your headphones, paying close attention to any dirt or grime buildup. For hard-to-reach areas, use a cotton swab dipped in the cleaning solution.
Once you’ve thoroughly cleaned the exterior, take sanitizing wipes and gently go over the surfaces to eliminate any bacteria or germs. This will ensure that your headphones are not only clean but also hygienic.
Next up, we’ll discuss how to clean the ear cushions and tips without damaging them in the process.
Clean the ear cushions and tips
When cleaning the ear cushions and tips, it’s important to be gentle and cautious to avoid any damage. Start by removing the cushions or tips from the headphones, if possible. Inspect them for any visible dirt or debris.
To clean ear wax buildup, use a soft cloth or cotton swab dipped in a mild cleaning solution specifically designed for electronics. Gently wipe the surface of the cushions or tips, making sure not to apply too much pressure. Avoid using alcohol-based solutions as they can deteriorate the material over time.
Once cleaned, allow them to air dry completely before reattaching them to the headphones.
Now that you’ve taken care of your ear cushions and tips, let’s move on to cleaning the headphone cables.
Transition: Now that you’ve ensured your ear cushions and tips are spotless, it’s time to tackle another crucial aspect of headphone maintenance – cleaning the headphone cables.
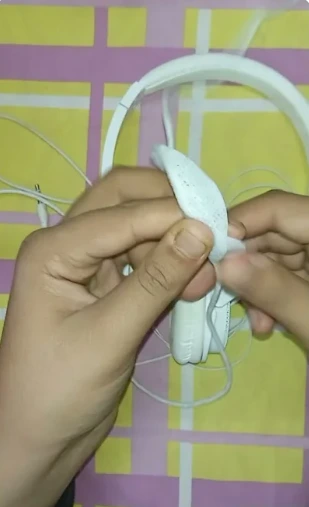
Clean the headphone cables
Don’t forget about the important task of keeping those headphone cables in pristine condition. Over time, dirt and debris can accumulate on the wires, affecting both their appearance and performance.
To clean the headphone wires, start by gently wiping them down with a soft, lint-free cloth to remove any loose particles. For more stubborn dirt or grime, dampen a cloth with a mild cleaning solution and carefully wipe the cables, taking care not to get any moisture inside the connectors. Be sure to dry the cables thoroughly before using them again.
Once you’ve cleaned the headphone cables, it’s time to move on to cleaning the headphone jack.
Clean the headphone jack
To ensure optimal sound quality, make sure to give your headphone jack some TLC. Over time, the charging port can accumulate dirt and debris, leading to poor audio performance.
To clean the headphone jack, start by turning off your device and removing any cables or accessories connected to it. Then, take a small toothpick or cotton swab and gently insert it into the port, being careful not to damage any of the internal components. Use a twisting motion to remove any built-up dirt or lint.
Once you have thoroughly cleaned the charging port, let everything dry and reassemble your headphones. This will help maintain clear audio transmission and prevent any further issues with your headphones’ functionality.
Let everything dry and reassemble
After ensuring your headphone jack is thoroughly cleaned, it’s important to let everything dry and reassemble your headphones for optimal audio performance.
Start by drying the individual parts of your headphones with a clean, lint-free cloth. Pay special attention to the ear cups and headband, as they tend to accumulate moisture during the cleaning process.
Once all the components are dry, it’s time to replace any worn or damaged headphone pads. Simply remove the old pads and attach the new ones according to the manufacturer’s instructions. This will not only improve comfort but also prevent sound leakage and improve audio quality.
If you’re still experiencing sound issues after reassembling, it may be necessary to troubleshoot further by checking your device settings or trying different audio sources.
Frequently Asked Questions
Conclusion
In conclusion, cleaning your headphones is a simple and essential task that can greatly improve their longevity and sound quality. By following the steps outlined in this article, you can effectively remove dirt, debris, and bacteria from both the exterior and interior components of your headphones.
Remember to gather the necessary materials, remove ear cushions and tips, wipe down the exterior, clean the ear cushions and tips, clean the headphone cables and jack, and let everything dry before reassembling. With regular maintenance like this, your headphones will continue to provide optimal audio performance for years to come.